Whenever you put real time into something, you'll get results, and when you don't all you're doing is selling yourself short at the end of the day!
So with no further wordage...here's how it all ended up....
Once you've trued up your pattern, you have to cut it out, then lay each piece on top of your fabric and cut the number of pieces needed for your design.
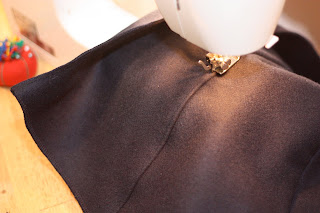
I was taught to "baste" my pieces prior to sewing them (basting=hand sewing your pieces together with a loose stitch just as a safe guard to ensure that your pieces match up perfectly) The more comfortable you get with your sewing though, corners start to get cut a little....so now I just pin my pieces together first, which is still much more dependable than free stitching on your machine.
When you sew pieces together one thing that I find always ensures that your garment doesn't look too "Suzy Home-Maker" is TOPSTITCHING (topstitching is simply that, running a stitch on the top of your fabric just off of the seam) as a matter of fact take a look at what you're wearing now...you'll see that it has topstitch finishings all over it....well....go look!!! :)
* KEY Whenever you sew a seam together (before you topstitch) you have to iron it open....the steam helps release the tension in the fabric and can also hide minor inconsistencies in the straight stitch of your seam.
It's all in the detailing....even the pockets get topstitching.
Many people think that designers just "whip something up" but that's not the case. There's actually a lot more involved. You may have noticed that my Tailor's Form is armless....so "How do you make the sleeves?" Simple....MATH....First I measure my arm hole and map out where I want the largest and smallest parts of the sleeve to be. In this case...my sketch called for a sleeve that tapered in then came back out a little bit at the wrist (or cuff), so of course my pattern needed to reflect that. (this was probably one of the harder parts of construction for me when I started draping)
*draping=designing your own pattern from a 3-D figure without the help of any "ready made" patterns
Again my sketch called for different parts of the sleeve as well. Some parts were straight while others were shingled. So then I had to figure out the proportions of each part true up those measurements then cut. (this also included figuring in the "hooded shoulder" that I had drawn.
The only way to get "strips" of fabric is to cut them! So I had to measure the width and lengths of each strip and marked it all off with chalk.
Cut!
Once cut each strip had to be sewn together to create a new fabric with the texture that I needed to match the sketch. (It's tedious, but when you want something, you have to work for it....right?!)
Once that's all over with an you've connected all of the parts that make your jacket, you still have to close it. In this case, because of the integrity of my design I couldn't use just anything to close it...it had to be subtle. So I used closures called "hooks and eyes" where one side literally "hooks" into the other. The only setback is that this has to be done by hand so you have to measure where everything should go first, THEN you can sew each "hook"....then each "eye".
Just when you thought it was over! Don't forget the lining for if it gets really cold (Essentially linings are a less complicated replica of the jacket itself that gets sewn, snapped, zipped, or hooked into the jacket) If you want the option of going liningLESS it's best to attach it with snaps, hooks, or a zipper.
Then You're done!
Front View
Rear View
Detail Shot of Collar
Optional Faux Fur Lining (should be turned inside out when set into the jacket so the fur touches the body)
Model: Jorge
Designer: Will White for JeDure
(shot by Will White)
Sewing has a lot of measurement and preparation behind it, which in turn requires a great deal of patience, but it's all worth it when you don't have to go back to fix a mistake.
Lesson: If you want something to come out right, you have to put your all into the preparation. You get what you work for.


Nice work Will!!! Looks great!
ReplyDeleteI'm loving this jacket!!!
ReplyDeleteYour work is awesome. Very talented. Found a link to your blogspot thru Jorge on Facebook.
ReplyDelete